Join US
Do you want to build the fantasy world you’ve always dreamed of?
Subscribe to receive notifications when a new post is out and for our monthly newsletter!
You can always unsubscribe anytime.
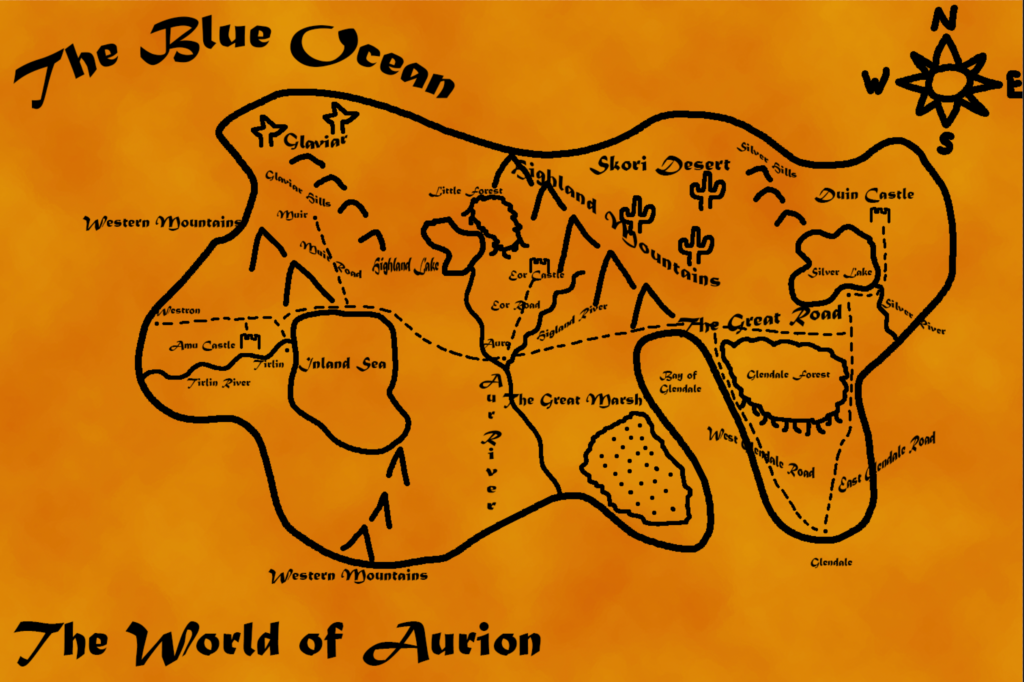
You’ve decided to start creating your own world but there’s one thing it needs and it’s a map. A fantasy map helps you, the creator, decide what place goes where, just as they help your audience make sense of your world. A volcano smack dab in the middle of the ocean? Or the words Haunted Castle right next to an image of a castle, high up in the mountains? Maps are fun to look at as they showcase their creator’s imagination.
Now that you want to design your own fantasy map, you’re wondering how do I begin? What you need to remember is that while your map features the setting your story takes place in, it needs to look similar to those of Earth. Mountains need to look like, well mountains, not something else. Designing this way helps your audience bridge the gap between your world and the real world, as they’ll be able to easily identify points of interest such as cities or forests by using real-world symbols.
Sketching it similar to Earth goes a long way in getting your audience invested in your story. Before long, you’ll have converted them into fans who will want more from you!
If you go another route, that is, making your map wholly unlike Earth, make it easy for your audience to read and understand. The last thing you want is to have an amazing story be plagued by a horrible map!
There are two central methods in creating a fantasy map and we’ll explore one in this article: drawing it by hand. The other method will be covered in the next article and for a sneak peek, it relies heavily on using noise.
Every great idea has a beginning and we start with a blank piece of paper. When working in Photoshop or your favorite application, be sure to save often!
People have been hand-drawing maps ever since the beginning of time and while most fantasy maps today are created with technology like Photoshop, drawing it by hand is still popular and you can do this in Photoshop! Alternatively, if you don’t have Photoshop, use another drawing application like Photoshop. I’ll use Photoshop throughout this to help guide you.
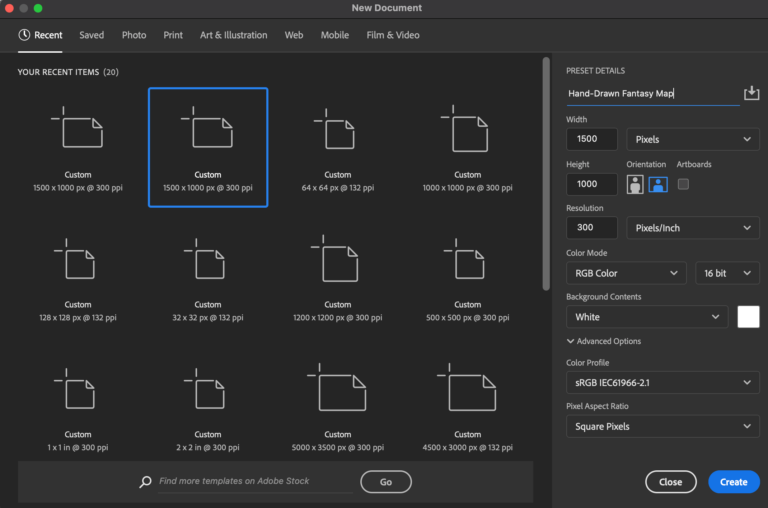
Create a new file and name it Hand-Drawn Fantasy Map. Set the height and width to however large you want. The sky’s the limit, though be aware that the larger it is, the more space it’ll take up on your device. Remember, most maps are rectangular so typically 1000 by 1500 is good for a starter, basic map, which is what we’re designing. For highly-detailed maps, go even larger. If this is your first ever map, start small so you get a feel for how it works before starting a larger one.
In Photoshop, create a new layer and name it Outline. Ensure you’re using default colors. To do so, press d. This is the layer that shows the overall shape of your world. Go to Pencil Tool (‘b’) and adjust the size to 10 pixels.
Now comes the fun part! Let your imagination run wild! Draw the shape of the land for your fantasy map! Don’t focus on anything else, just draw the shape. Take as much time as you need, there’s no rush!
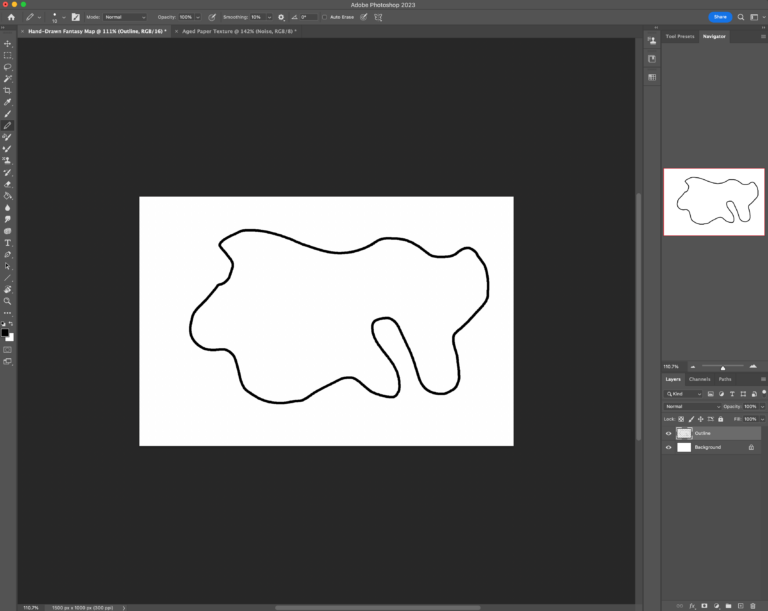
When you’re done, take a good look at it and see if you’re satisfied. If you are, move onto the next step. If not, make the changes you need. Not happy with the shape? You can erase it (in Photoshop, use the Eraser Tool (‘e’) and use it to erase it and start over. Work on it until you’re good with it.
Now that you have a shape for your fantasy map, the next step is to add terrain, rivers and so on. Just remember that what’s outside the shape is the ocean so you need to have your rivers flow out to it.
Before we add anything, the very first thing you need to do is determine what points north. This is an important step, as everything you draw from here on out is affected by what’s pointing north. We’ll go over the details as we add terrain. Draw a compass in either the northwestern or northeastern corner of your map.
You’re now ready to start drawing inside your fantasy map. Keep in mind that as you add more, it still needs to make sense, not just to you but to your audience. The first thing to put on is lakes and other inland water areas. Use a smaller size like 8 pixels. Draw various shapes and sizes where you want your lakes to be. Work on it until you like how they look.
The next thing on the list is mountains and hills. Use a size like 8 pixels to draw them. Generally speaking, mountains and hills tend to run north-south, NW-SE, NE-SW, or a mixture of these directions. Mountains that run west-east are uncommon but they can work. The reason why these mountains go in these directions is due to the planet’s plate tectonics which affect how landmasses form and move. Put them where you want and if you want a range, put them in a line. The symbols for mountains and hills are shown in the example below.
Rivers and streams are next. They typically start in the mountains or lakes and flow out to the sea. Rivers flow away from mountains. That means, if a river’s source is a mountain range that runs north-south, it needs to flow either east or west due to the elevation continually getting lower the further you go from the mountain and nearer the ocean. Rivers always flow downstream, never upstream, nor in a straight line. Set your pencil to 6 pixels and draw solid lines that meander as they go from their source to their endpoint, which might be another river or the ocean.
With rivers and streams done, we turn our attention to forests and other woodland areas. It’s not a good idea to just draw one tree to represent a forest. Instead you want to draw a bunch of trees and put them where you want forests to be. You can still use the same 6 pixels pencil size to draw them. A rule of thumb is trees like to be near water so put them by rivers or have a river running through or place them next to lakes. Trees also like mountains so place some next to them.
The last terrain to add to your fantasy map would be desert, swampland, and tundra. Feel free to keep your pencil set at 6 pixels. For deserts, you can use cactus or dots to signify sand. Remember, deserts tend to be further inland due to how dry land gets the further it gets from the ocean, though there can be coastal deserts. As for swampland, draw a large shape and put dots all over inside it. Swamps are usually found close to rivers or oceans or other bodies of water.
Finally, for tundra, use a bare tree and their placement depends on where the landmass your story takes place in is located on the planet. If it’s in the northern hemisphere, put tundra in the northernmost areas. If it takes place in the southern hemisphere, put them in the southernmost region. The symbols for each can be seen on the map below.
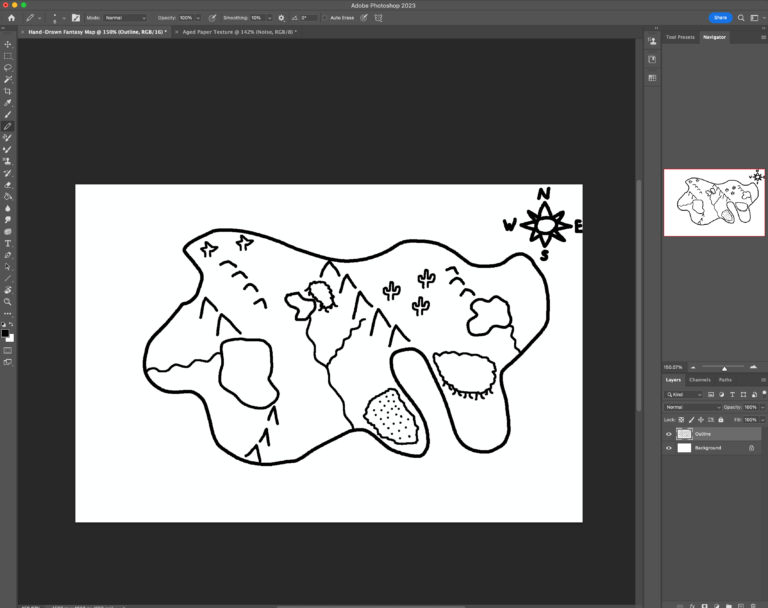
With the terrain all done, you can go ahead and add cities/towns, castles, and roads. Create a new layer and name it Cities. Use a black dot set at 4 pixels to signify a city. Cities tend to be concentrated near rivers and oceans and forests.
Open a new layer and name it Castles. Draw a small castle (with your pencil still set at 6 pixels) where you want them to be. Castles can be found anywhere, so feel free to put them where you want them to go!
For roads, create a new layer and name it Roads. Use a dashed line to link cities and castles. Set your pencil size to 4 pixels. Roads generally don’t run in a straight line, they tend to curve.
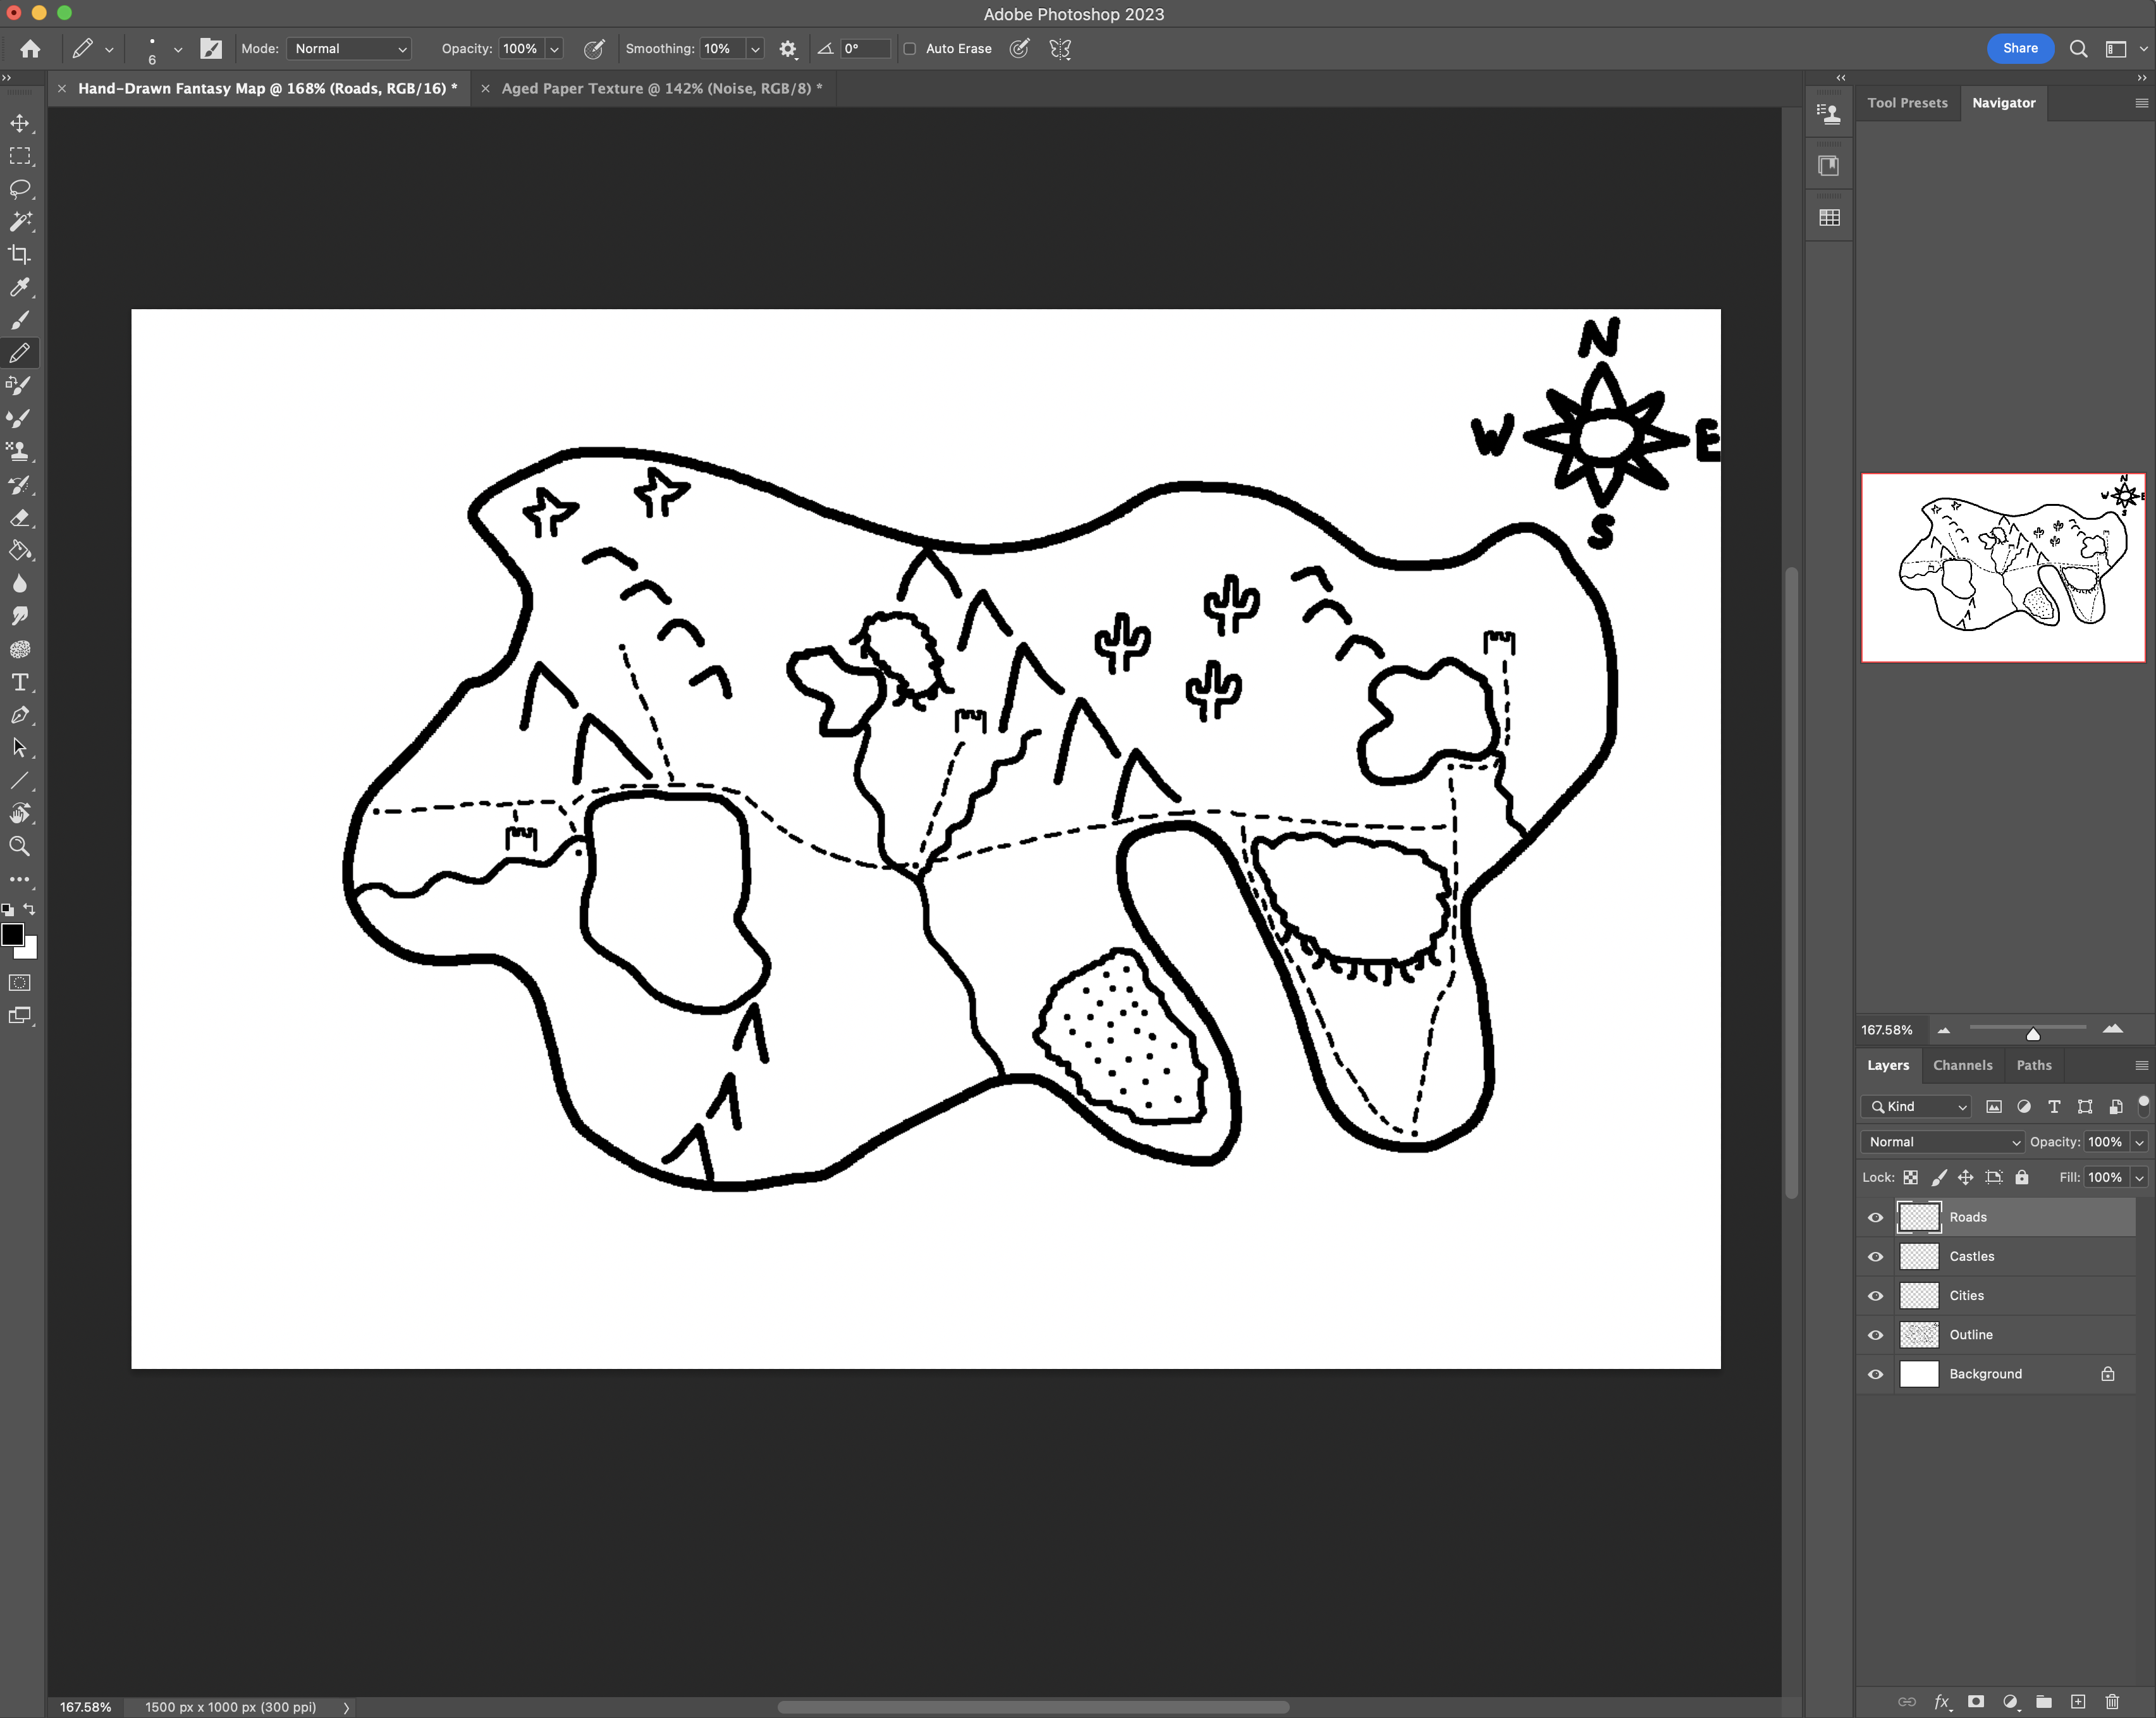
Go to Layer at the top of the screen and scroll down to New. Next, go to Group and select it. The New Group textbox comes up and name it Map. Put the layers Outline, Cities, Castles, and Roads inside the Map Group.
This is where you now start adding text to your world. Go over to the Horizontal Type Tool (’t’) and select it. Add text to your terrain, cities,, and so on. There’s a naming hierarchy. The largest size goes to the name of the landmass, which is usually placed either at the top or the bottom of the map. Nations/oceans are the second-largest. Next down in size are lakes and mountains. Roads, cities, rivers, castles are all the same in size. To adjust your size and font, you need to be in the layer of your selected text and the adjustments can be made at the top of the screen.
To curve your text, select the text layer you wish to curve and go to the top of the screen where you see the letter T over a curve. Clicking that takes you to the Wrap Text textbox. Go to Style and experiment with the You get a preview of what it looks like. Adjust it as needed before clicking okay.
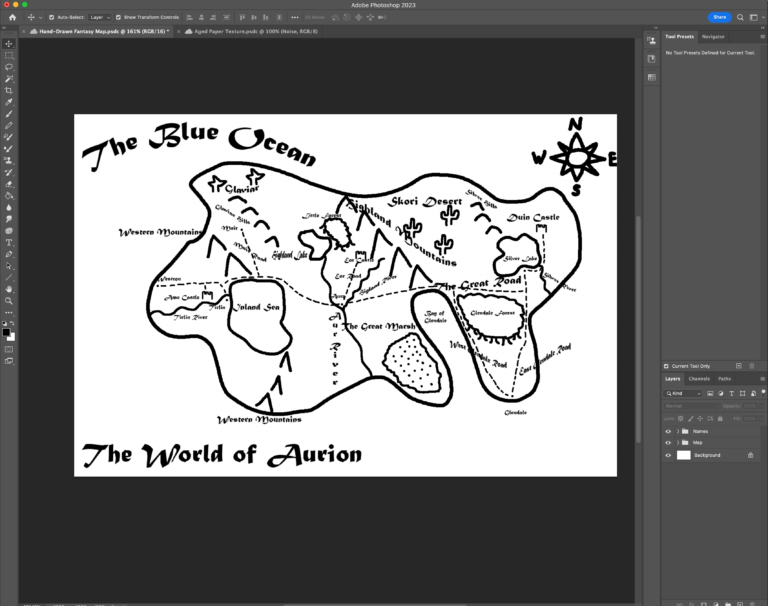
When you’re done, go to Layer and scroll down to New. Go to Group and select it. In the following textbox, name it Names. Put all of text layers in this group.
You’re now done with this part! Everything on your map should all flow together to make a map that while it’s clearly fantasy, it’s easy for your audience to digest and grasp and enjoy!
With the outline of your fantasy map done, check everything to be sure everything looks the way you want. Now is the time to make whatever adjustments you need. Whenever you’re done, move onto the next step.
Many fantasy maps use an aged paper texture to give off an antiquated look. You could use any aged paper texture you find online but I would advise against doing that. You’ve put in a lot of work in creating your own map and it wouldn’t be completely unique if you used someone else’s work. Instead, you should make your own and it’s easier than you think it is.
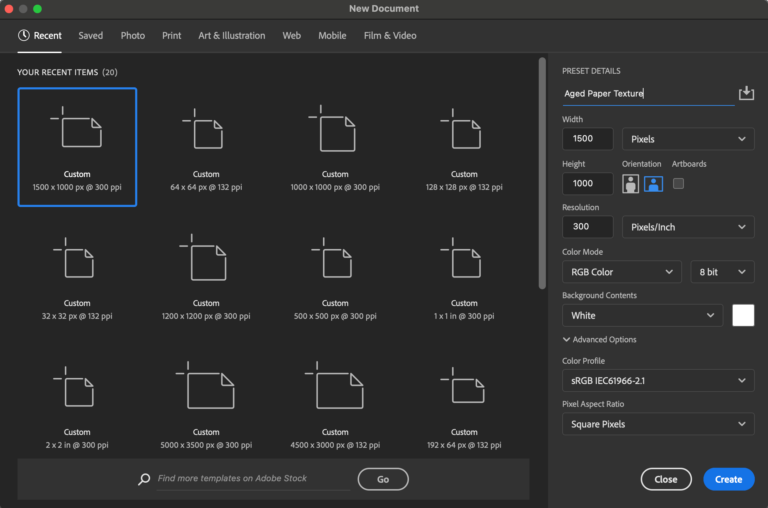
In Photoshop, create a new file. Ideally, you want to set your height and width dimensions to match that of the one for your map. Set your resolution to 300 pixels/inch. For color mode, use RGB and use 8 bits. Ensure you have default colors on. If not, press d.
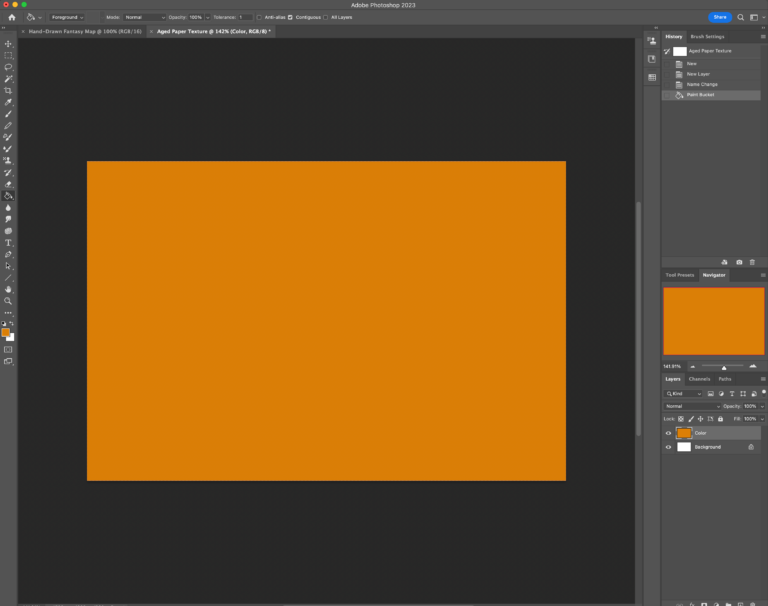
Make a new layer and name it Color. Select a light brown color like #db7f07 and use the paint bucket tool to fill the whole layer. You can hide the Background layer.
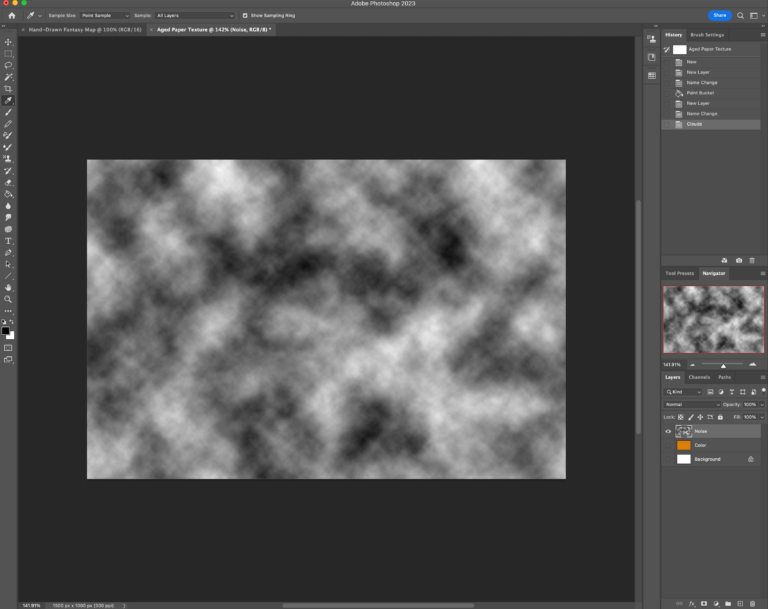
Next, create another new layer and name it Noise. Hide the Color layer. Set your colors to default again. Now, go to Filter on top of the screen and scroll down to Render. In Render, go over to Clouds and and hit it. You should have something that looks like this:
ove your mouse over to Blend Mode and change it to Overlay. Unhide the Color layer. Your picture should look similar to this one:
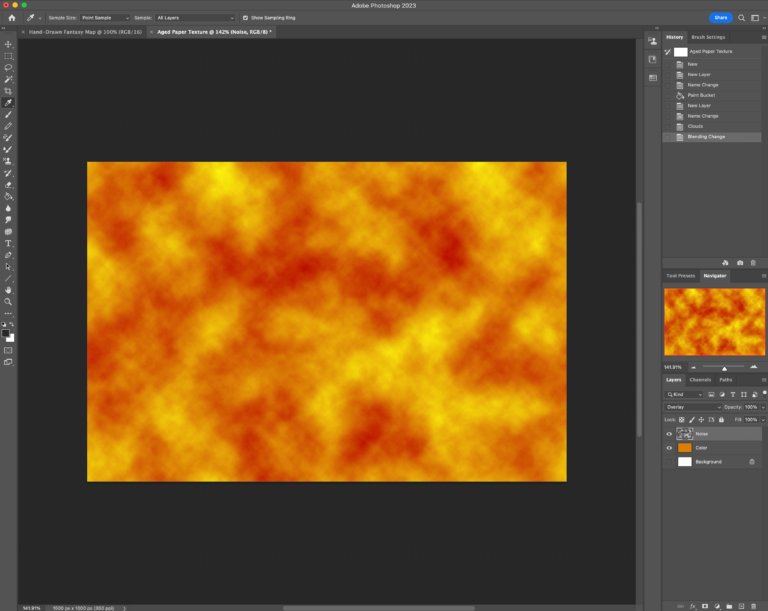
Lower the opacity setting to around 20%. You still want to have some varying shades of brown visible.
Veer over to Filter on top of the screen again. Scroll down to Filter Gallery and tap it. Entering the Filter Gallery, you see a lot of different brushes. You want to use an Artistic Brush which is at the top right. Use the Dry Brush. Feel free to experiment with the brush settings to find one that works for you. Press Okay and it’ll take you back to your image.
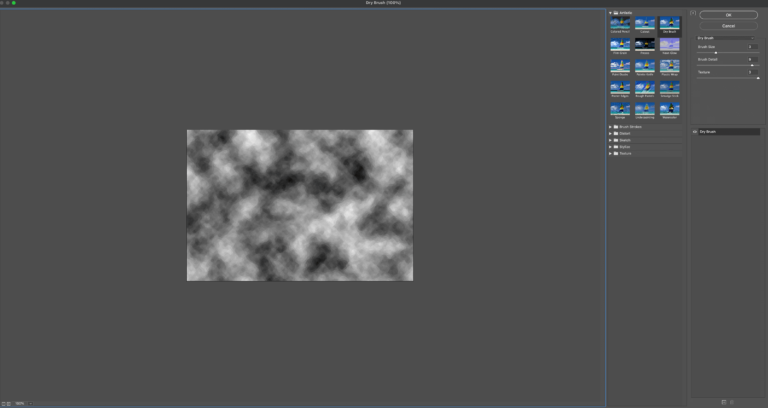
If you don’t like how it looks, you can always undo it. Go to Edit at the top of the screen and scroll down to Undo and hit it. Go back to Filter Gallery and go to Artistic Brush and select Dry Brush and change the settings. Press okay to see what your image looks like. Work on it until you’re happy with everything.
Merge the Noise and Color Layers. To merge, go to Layer and scroll all the way down to Merge Down and tap it. Go ahead and save it so you can use it again for future projects.
That’s all for making an aged paper texture! Now all you have to do is combine the two files together. With your layer selected, copy your paper texture by going to Edit and then scrolling down to Copy.
Return to your Hand-Drawn Fantasy Map file and start a new layer. Paste (Edit > Paste) in the new layer and your aged paper texture should show up. Your paper texture is there but your map isn’t showing up. This is because the new layer is at the top. To make your map visible, you’ll need to move it to the bottom, above Background. Hover over this layer and hold it and move it accordingly. Your map should appear and the final image should look something like this.
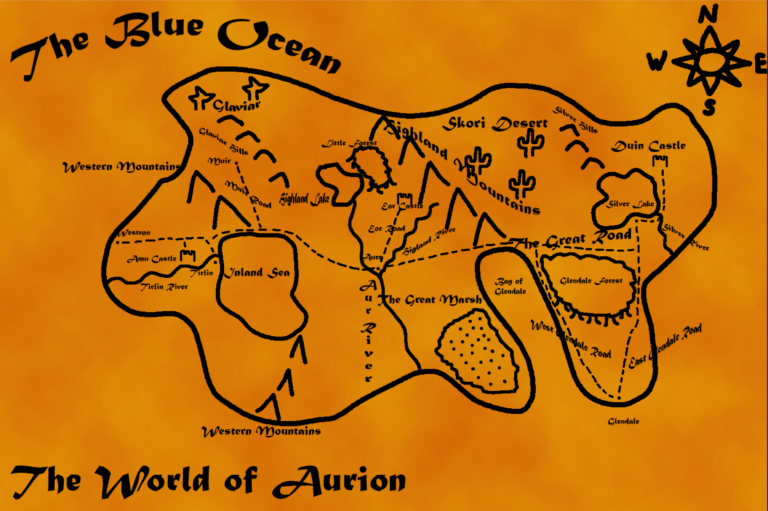
Congratulations! You’ve successfully created a hand-drawn fantasy map!
Making a fantasy map from scratch brings the world you’ve long dreamed about one step closer towards making it reality. You now have something that shows your world is a real place and your audience can’t help but be captivated by what you’ve created.
Even though you’ve designed your first map, your work is far from over. Map-making is a skill that only gets better with practice. Most likely, you’ll make multiple maps of your world and each one will be better than the last. Eventually, you’ll develop your own process and you’ll refine it as you make more and more. Before long, you’ll be a pro in map-making! Every great journey starts with one step and it begins right here, making your first-ever map.
Let me know what you think in the comments below. (Note: this is an account-exclusive feature).
If you don’t have one, you can register here. It only takes a few moments of your time!
Liked this article and want to subscribe? All you have to do is fill out the form below and that’s it!
Thanks for reading this and until the next time,
Sunfire
Subscribing means you receive:
You can always unsubscribe anytime.
Do you want to build the fantasy world you’ve always dreamed of?
Subscribe to receive notifications when a new post is out and for our monthly newsletter!
You can always unsubscribe anytime.